# 3D Probe
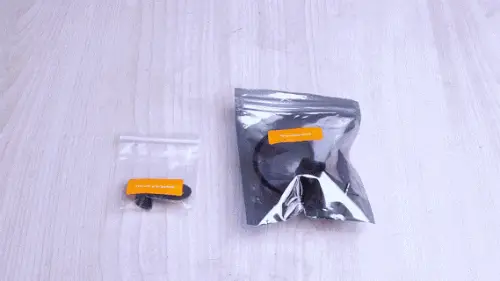
¶ 1. 3D Probe Accessory List
The 3D probe has a shank diameter specification of 3.175mm and includes the following accessories:
- ✅ Bracket × 1
- ✅ 3D probe body × 1
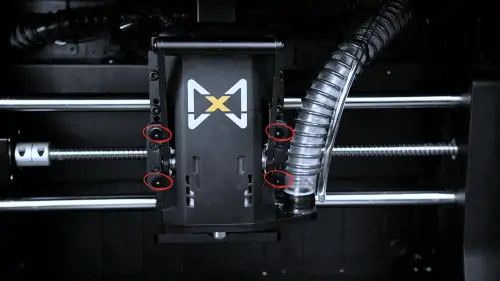
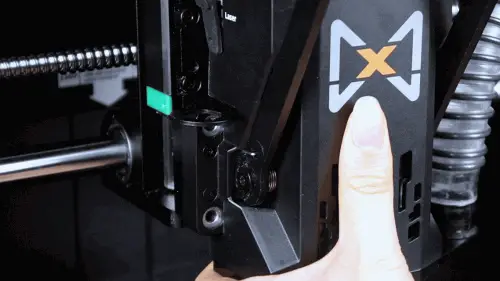
¶ 2. Remove Spindle Fixed Screws
Loosen the 4 fixing screws and hold the spindle by hand to prevent accidental dropping.
¶ 3. Install 3D Probe Bracket
Install the bracket on the device in the direction shown in the image:
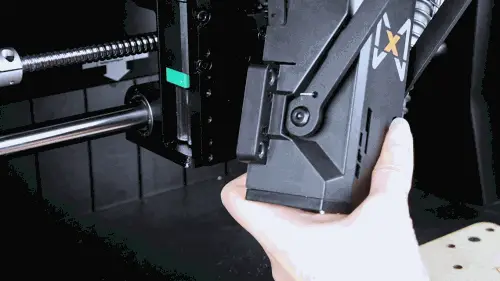
⚠️ Installation Notes:
- To avoid noise from resonance during processing, the bracket is designed to fit very tightly
- You can insert it halfway first, and for the remaining part, use the spindle backplate, press it against the backplate, and press the spindle from front to back to squeeze the bracket into the slot
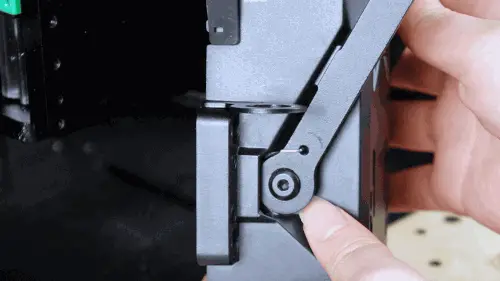
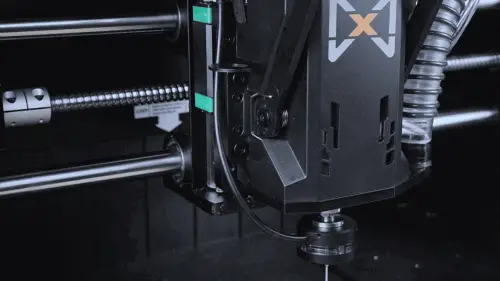
¶ 4. Bracket Installation Complete
After installation, as shown in the image, confirm that the bracket is fully in place and securely installed:
¶ 5. Reinstall Spindle
Reinstall the spindle according to the actual height of the workpiece. If the workpiece height is too high, install it in the topmost position.
📏 Height Adjustment Tip: Adjust spindle height according to different workpiece thicknesses to ensure the probe can accurately contact the workpiece surface
¶ 6. Install 3D Probe
🔌 Connection Steps:
- Take out the 3D probe and insert the connection cable into the interface first
- Then pull down the handle and insert it into the spindle
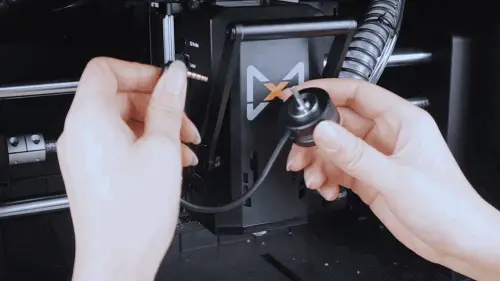
⚡ Electrical Safety:
- Ensure the connection cable is firmly inserted
- Check that the interface is not loose or has poor contact
- Avoid bending or pulling the connection cable
🔧 Mechanical Installation:
- Confirm the probe shank is fully inserted into the spindle chuck
- After the handle springs up, check the locking status
¶ 7. Store 3D Probe
After use, you can place the 3D probe on the bracket. As shown in the image, align with the holes and snap onto the bracket.
💡 Storage Tips:
- Handle gently during storage to avoid collision damage to the probe
- Ensure the probe is fully snapped into the bracket holes
- After storage, check probe stability
🧹 Maintenance Suggestions: Regularly clean the probe surface to maintain measurement accuracy
¶ 8. Connection Cable Direction Adjustment
✅ Correct Installation Direction:
After fixing, the cable should face forward
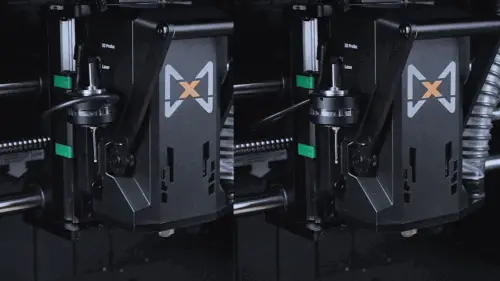
🚨 Important Reminder:
- If the connection cable direction faces backward, it may be squeezed during homing, causing the device to fail to home
- Please ensure the connection cable faces the correct direction
🔄 Homing Check: After installation, it is recommended to perform a complete homing operation test
⚡ Troubleshooting: If homing fails, first check if the connection cable direction is correct